How to Use a Wax Seal StickWicked, glue-gun, and wickless sticks
Sealing wax sticks come in three common formats: wicked sticks you light like a candle, round sticks made for low-temperature glue guns, and solid wickless bars you slice or warm gently. Matching your heat source to the stick prevents soot, runny puddles, and stuck stamps.
 Play tutorial
theMellieway (Wax Stamp School #3.3) demonstrates working with both wicked and wickless wax seal sticks, including spoon melting and direct-flame control.
Identify, melt, stamp, and release
1. Identify your wax stick type and prep your desk
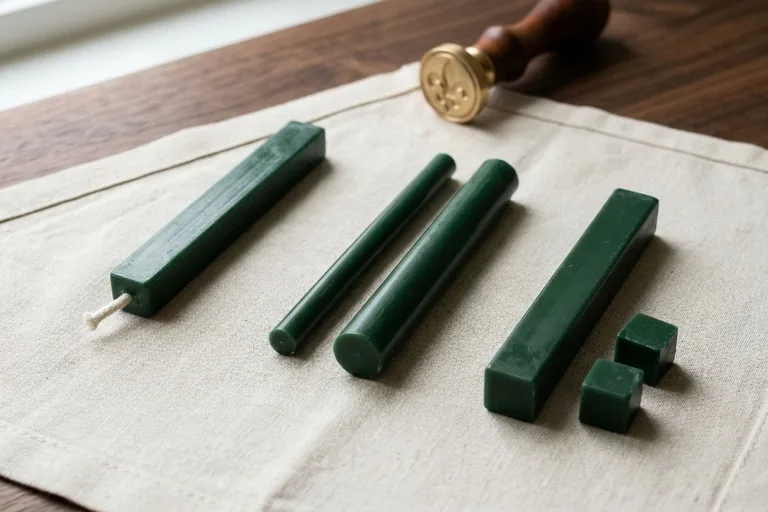
Look at the ends and profile of the stick first. A traditional wicked stick has a cotton wick running through the center. A glue-gun sealing wax stick is smooth and cylindrical—usually 7 mm for a mini gun or 11 mm for a full-size gun. A solid wickless bar has no wick and is often square or rectangular.
Check whether the formula is flexible wax (best for envelopes going in the mail) or traditional brittle wax (best for hand-delivered notes or presentation pieces). Set out a heat-resistant silicone mat or scrap envelope, a brass stamp with a top mark on the handle, a dry cloth, and a wrapped ice pack. For large batches such as wedding invitations, glue-gun sticks on a silicone mat give the fastest, most repeatable results.
2. Melt the stick with the right heat source
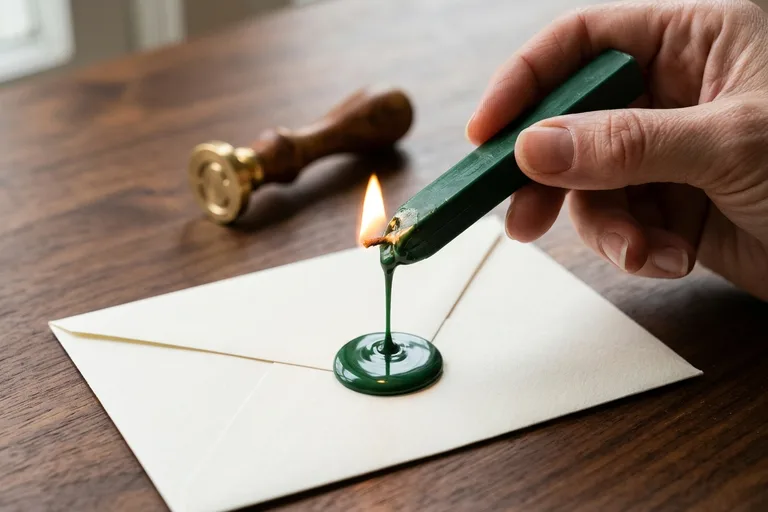
For a wicked stick, trim any long charred tip, light the wick, and hold the stick at a gentle downward angle over the envelope flap or silicone mat. Rotate slowly so the wax melts evenly and drips into one centered puddle slightly wider than your stamp face, then blow out the wick.
For a glue-gun stick, load the matching diameter into a low-temperature glue gun and preheat it with the nozzle resting over silicone. Bring the nozzle close to the surface and pull the trigger steadily in one spot until you have a neat pool—avoid high-temperature craft guns, which turn flexible wax overly thin and bubbly.
For a solid wickless stick, slice small pieces with a craft knife and melt them in a spoon over a tea light using the melting-spoon letter sealing steps, or warm the tip just above a small flame and swirl the softened wax directly onto the paper without burying it in the flame.
3. Smooth the pool and press straight down
Dripped wax from a wicked stick can leave tiny air pockets or small specks from the wick. Before stamping, briefly swirl the unlit end of the stick or a metal pick through the warm pool to blend it into an even disc. With glue-gun or spoon-melted wax, pause a moment if you see active bubbles.
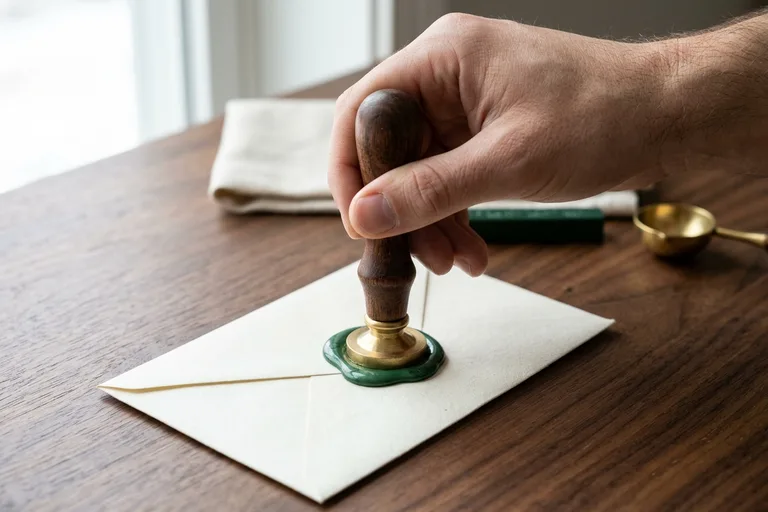
If you chilled the brass stamp on an ice pack, blot away any condensation with a dry cloth so water does not pit the wax. Check the alignment mark on the handle, center the face over the puddle, and press straight down with light, even pressure. Keep the handle still once it lands.
4. Wait until firm, lift cleanly, and finish
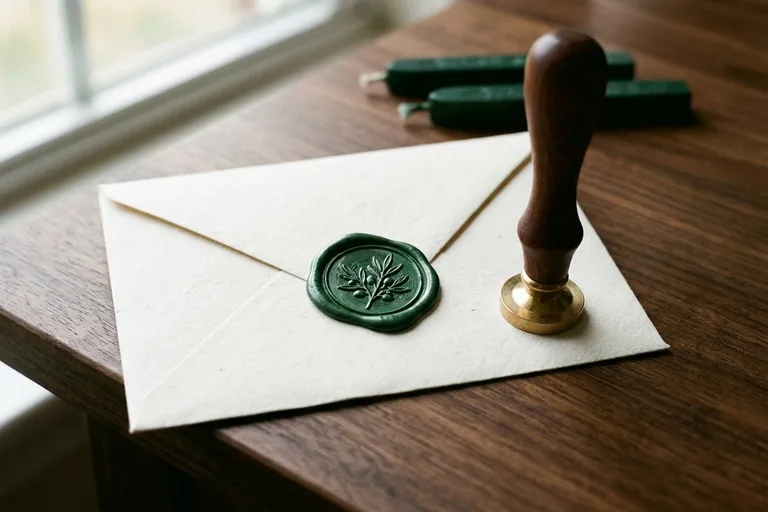
Nudge the handle lightly to test firmness. If the rim shifts or the stamp pulls the wax upward, leave it seated a little longer. Once the wax feels solid, steady the paper or silicone mat with your other hand and lift the stamp straight up.
If you sealed directly onto an envelope, check that the rim bridges both the flap tip and the paper underneath. If you stamped onto a silicone mat, peel the cooled seal off and follow our guide to applying wax seals with double-sided backing on envelopes, vellum, or ribbon.
Precautions and common mistakes
Use a low-temperature glue gun and match the size
Never force an 11 mm stick into a 7 mm mini gun, and skip high-temperature glue guns. Excess heat makes modern sealing wax too watery, causes air bubbles, and slows down cooling.
Avoid black soot on wicked sticks
Hold the stick near the clean outer edge of the flame instead of burying it in the smoky core. If black smoke appears, snuff the wick and trim the charred tip before dripping again—especially with white or pastel wax.
Protect skin and work surfaces
Molten sealing wax can burn fingers and stain wood or fabric. Work over a heat-resistant silicone mat, keep paper edges away from open flames, and rest a warm glue-gun nozzle over silicone to catch drips.
Purge the glue gun when changing colors
Part of the previous wax stick stays inside the barrel. Push a plain clear hot-glue stick through until it runs clear before inserting a new wax color, or keep a second low-temp gun for pale shades.
Always wipe a chilled stamp dry
Chilling the brass head on an ice pack stops wax from sticking during repeat stamping, but any moisture left on the metal creates pinholes and cloudy patches in the finished seal.
Pick flexible wax sticks for mailed envelopes
Traditional hard wax sticks can crack in postal sorting machines. Use flexible resin-blend sticks for mailed letters and wedding invitations, and tuck decorated inner envelopes inside a plain outer envelope.